


Kitchen Island Design: Size, Function & Layout Guide
A San Jose cabinet design studio's guide to kitchen island design: sizing, seating, storage and layout, with the NKBA clearances behind each number.
Why the Island Is the Hardest Part of a Kitchen to Get Right
A kitchen island sounds simple until you're the one planning it. It has to hold up under prep work, sometimes seat people, often hide the dishwasher or trash pullout, and still leave enough room to walk around it without anyone getting elbowed while the oven's open. A kitchen can feel cramped not because the room is small but because the island is sized wrong for it.
The issue is that an island is rarely just one thing. It's asked to be a prep station, a serving counter, a breakfast bar, extra storage, and sometimes the visual anchor of the whole room, all at once. It's easy to plan one around photos of islands in much bigger kitchens, and only find out the clearance is tight once the cabinets are in.
Getting island design right starts with clearance, not style. The National Kitchen and Bath Association (NKBA Kitchen Planning Guidelines) recommends work aisles of at least 42 inches for one cook and 48 inches for a kitchen with more than one cook, with 36 inches as the minimum for a walkway. That number should come before door style, countertop material, or seating count get decided, because it determines how big the island can actually be in your specific room.
Once clearance is settled, the rest of the decisions, seating, storage, appliances, get a lot easier because you're working within a real boundary instead of guessing. The next few sections walk through each of those decisions in order.
Sizing the Island to Your Actual Kitchen
There is no single minimum size for an island; it depends on what you want it to do and how much room is left once the aisles are planned. Freestanding islands are sold smaller than many people expect: IKEA's VADHOLMA, for example, measures 49 5/8 by 31 1/8 inches and includes storage and room for seating (IKEA). A larger island, say 6 feet by 3 feet, gives more room to separate a prep area from a seating area, but only if the aisles around it still meet the clearances below.
But length and width aren't the only measurements that matter. Here's what to check before committing to a size:
- Aisle clearance: 42 inches minimum for a work aisle with one cook, 48 inches with more than one cook, and 36 inches for a walkway, measured from the island edge to the nearest cabinet, counter, or appliance (NKBA).
- Door swing overlap: Dishwasher doors, oven doors, and cabinet doors near the island need room to open fully without hitting the island edge.
- Knee space for seating: NKBA recommends a knee space 24 inches wide for each seated diner, 18 inches deep at a 30-inch-high table or counter, 15 inches deep at a 36-inch counter and 12 inches deep at a 42-inch counter. Check the stools you pick as well: their footprint, arms and footrests need room too.
If your kitchen is on the smaller side, an island isn't automatically off the table, but it may need to be a narrow prep-only piece rather than a full island with seating and appliances. Working from accurate measurements, a designer can check whether an island fits comfortably or whether a peninsula would serve the space better.
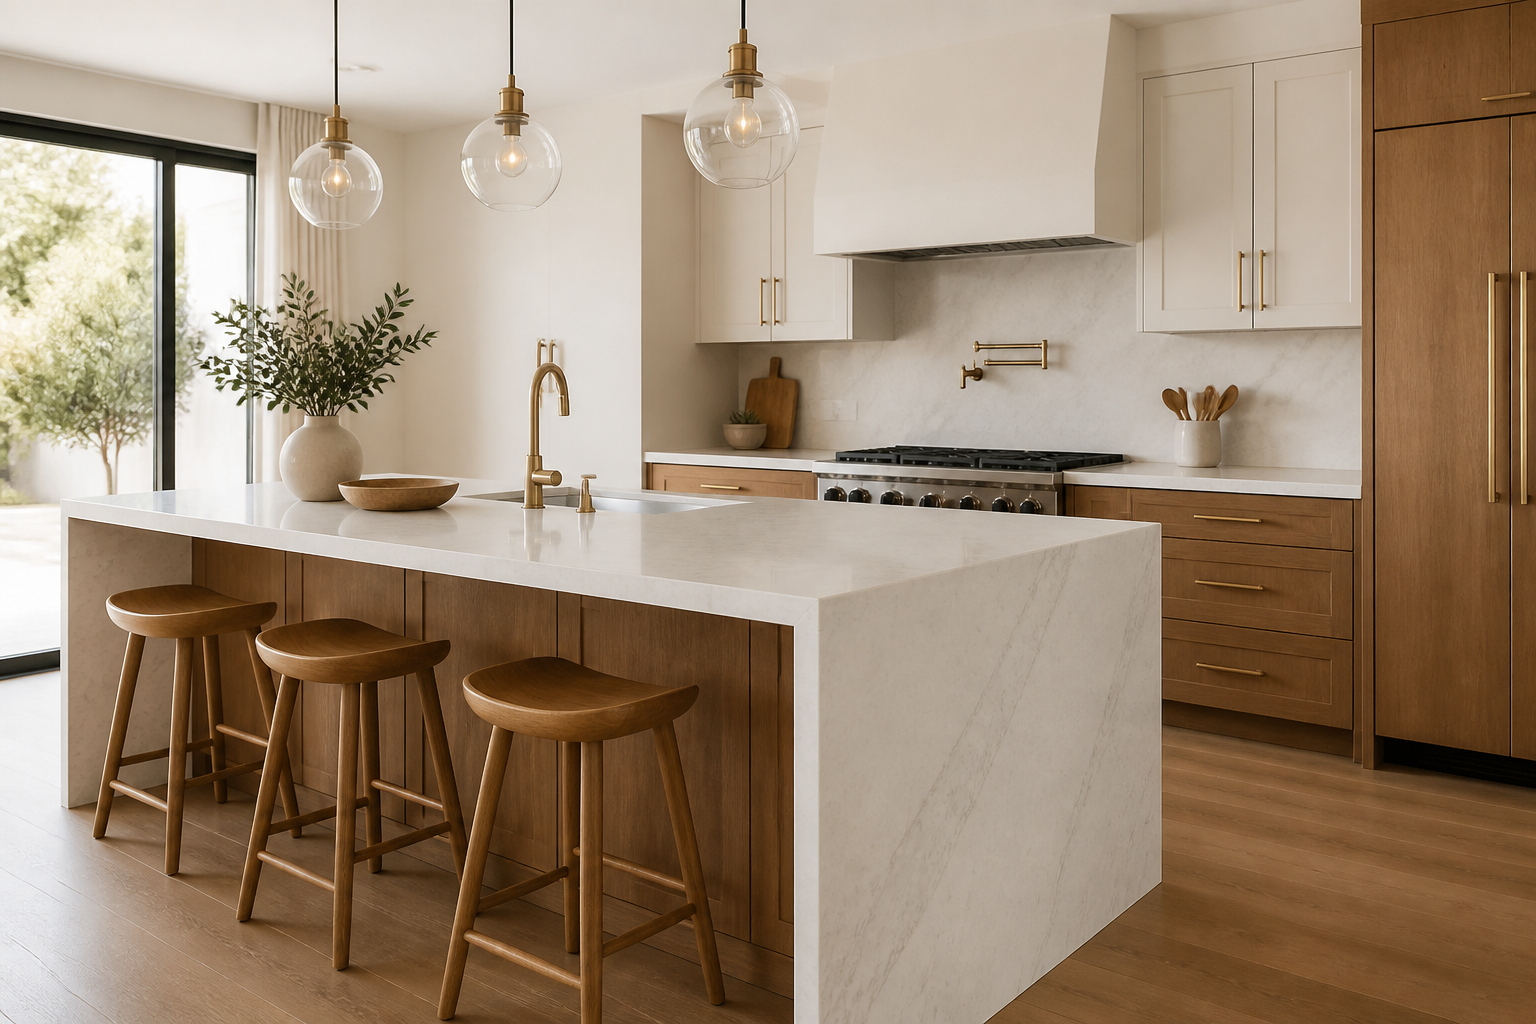
A waterfall countertop wraps down the end of the island; stools along one side make it a place to sit as well as work. Illustration.
Seating: How Many Stools Actually Fit
Seating is often high on the list for an island, and it's easy to overestimate how many stools fit. NKBA's seating guideline gives the numbers: allow 24 inches of width per seated diner, with a knee space 15 inches deep at a standard 36-inch counter (18 inches at 30-inch table height, 12 inches at 42-inch bar height).
At 24 inches per seat, a 72-inch (6-foot) run of seating fits three stools and a 96-inch (8-foot) run fits four, if the full length is open for knees. Any length taken by a waterfall panel, an appliance or a support leg on the seating side comes off that count. NKBA also recommends clearance behind the seats: 32 inches from the counter edge to a wall or obstruction where no one walks behind the diners, at least 36 inches for someone to edge past and at least 44 inches to walk past. Add that to the island's depth and the aisle on the other side to see whether the room can hold it.
Counter height matters too. A standard 36-inch counter generally takes counter-height stools, commonly around 24 to 26 inches tall, and works well when the island is flush with the rest of the kitchen counters. A 42-inch bar-height counter takes taller bar stools, commonly around 28 to 30 inches; check the maker's dimensions for the stools you choose. Bar height creates a visual break between the prep side and the seating side, which some homeowners like because it hides mess from anyone sitting at the island. Neither is objectively better, it depends on whether you want the seating area to feel connected to or separate from the work zone.
One detail that's easy to miss: legroom under the overhang needs to be clear of any support brackets, electrical outlets, or drawer hardware. If the island includes drawers or appliance storage on the seating side, that side can't also hold knees. Planning the internal layout before finalizing the seating side avoids finding out after installation that stools don't actually fit where you wanted them.
Storage and Appliances: What Actually Belongs in an Island
An island's storage potential depends entirely on what's plumbed and wired to reach it. Anything requiring water, like a prep sink or dishwasher, needs plumbing run under the floor, which can mean cutting into a slab in an existing kitchen on a slab foundation. Ask your contractor about it early, since it can affect cost and schedule.
Common island storage and appliance options, from the simplest to the most involved:
- Deep drawers for pots, pans, and small appliances — works in any island with no plumbing needed.
- Trash and recycling pullout — keeps bins out of sight; it takes a cabinet bay, so it belongs on a side without seating.
- Microwave drawer — frees up counter space elsewhere, needs an electrical run but no plumbing.
- Wine or beverage fridge — needs an electrical run; check the model's installation instructions.
- Prep sink — useful when a second cook works at the island; needs water and drain lines.
- Dishwasher — works well in an island near the main sink run, but takes up an entire cabinet bay.
Every appliance or pullout takes a cabinet bay and its own door or drawer swing, and anything on the seating side takes knee space away. Rather than trying to fit everything, rank what matters most and lay out the bays against the island's actual length, leaving the counter space you need for prep. Our kitchen layout planning guide covers how island placement interacts with the rest of the room's work triangle, which is worth reading alongside this if you're still deciding on overall layout.
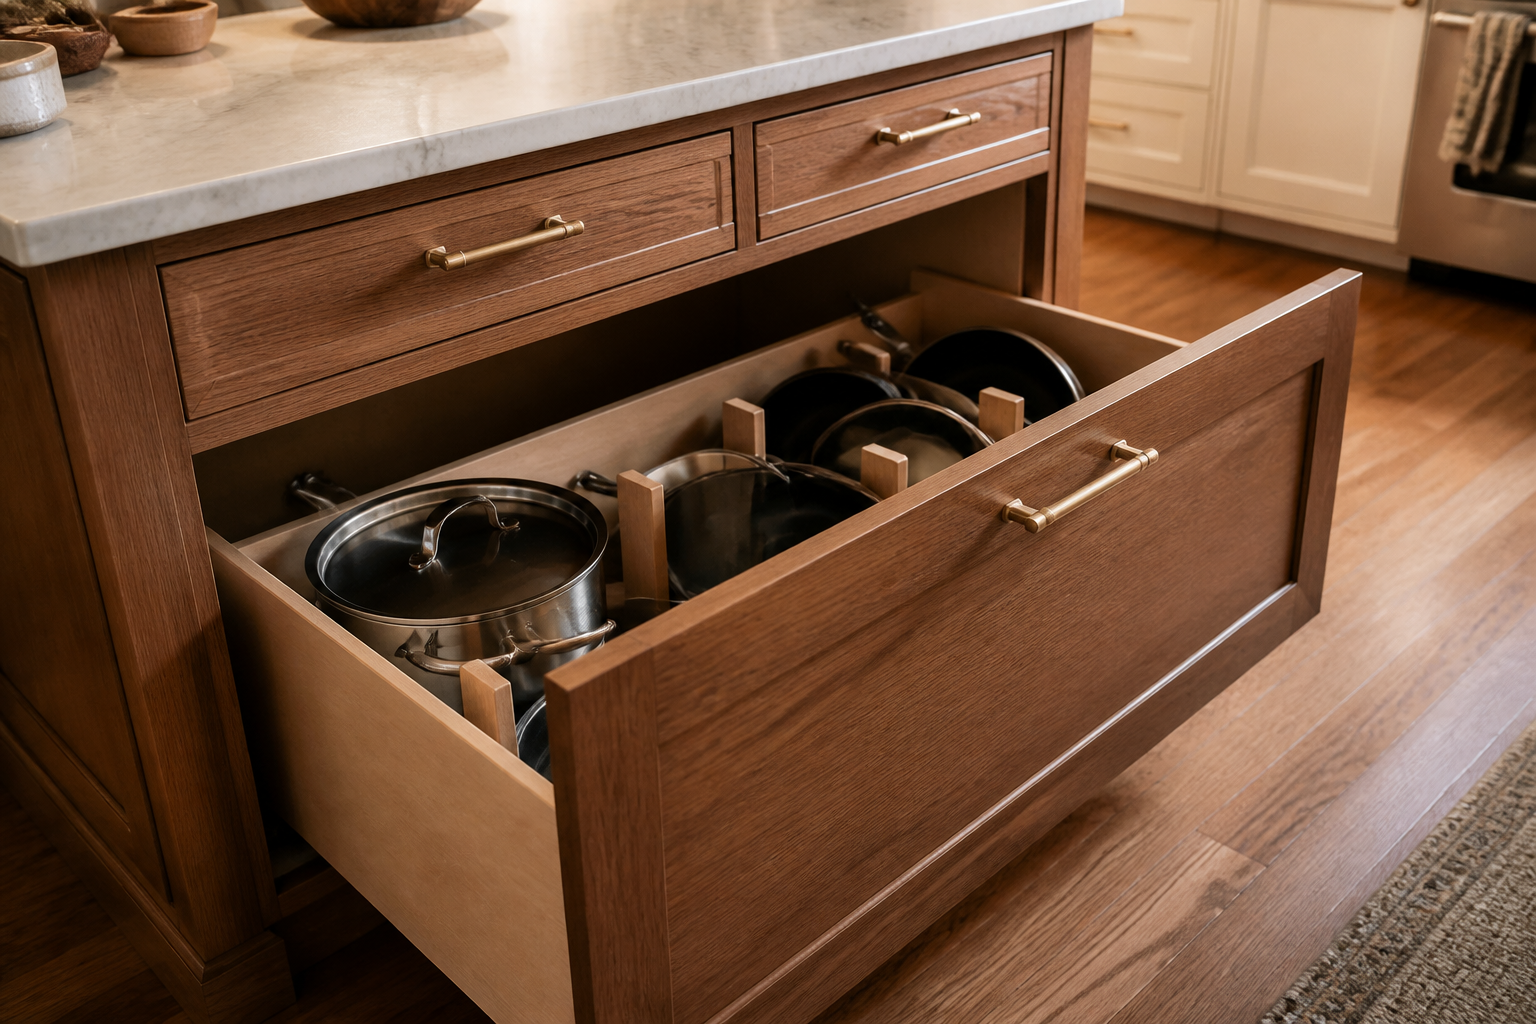
Deep drawers are among the simplest island storage options because they need no plumbing or wiring.
Matching the Island to Your Cabinet Style
An island doesn't have to match the perimeter cabinets exactly. A contrasting island, say a deep navy or forest green against white perimeter cabinets, gives the room a focal point instead of one long wall of identical cabinetry. Some people pair it with a waterfall countertop that wraps down the sides of the island.
If you already know which door style and finish you want for the rest of the kitchen, matching the island keeps the selection simpler. Whether a second color or finish changes the price depends on the cabinet line and the order, so ask for both options to be quoted. Shaker-style doors in particular read well whether matched or contrasted. You can see the range of options in our guide to shaker cabinet styles if you're weighing that decision.
Countertop material on the island is worth thinking about separately from the perimeter too. An island often sees prep work, hot pans and homework alike. Quartz is a common island choice because it is engineered to be nonporous, so spills don't soak in; even so, Caesarstone's care guide says to use trivets for hot cookware and a cutting board for knife work. Your stone fabricator can compare materials for your use.
Whatever combination you land on, it helps to see the cabinet line options in person before deciding. Door samples show grain, sheen and color better than a photo, and the San Jose showroom has door styles, finishes, hardware and full cabinetry displays to look at in person.
Island Layout Mistakes to Check For
A few island problems are worth checking for before drawings are finalized.
- Sink or range moved to the island without checking ventilation. A cooktop on the island needs a downdraft vent or an overhead hood, and routing a hood's ductwork can affect cost and construction. Plan this early, not after cabinets are ordered.
- Outlets forgotten. Current California code no longer requires an island outlet (only provision for a future one), so decide early whether you want outlets for prep or for charging at the seating side.
- Overhang without support. Deeper seating overhangs need corbels or steel brackets underneath, especially with heavy materials like quartz or granite. Ask your fabricator for the unsupported-overhang limit for your material and slab thickness.
- Island too close to the range or main sink run. Even with 42 inches of clearance, an island directly across from an oven or dishwasher can crowd the aisle when the door is open and two people are cooking. NKBA's guidelines also cover clearance in front of appliances, so check them against your appliance door dimensions.
- Lighting an afterthought. Kichler's kitchen lighting guide suggests hanging pendants 30 to 36 inches from the counter to avoid blocking eyelines (Kichler). Plan the number and spacing of fixtures against the island's length.
Catching these during design is easier than fixing them after cabinets arrive, and it is where planning from your kitchen's own measurements, rather than a generic layout, helps.
Getting Your Island Designed Right the First Time
An island works best when it is sized to the room's actual dimensions, not to a photo from a much larger kitchen. That starts with an accurate measurement of your space and an honest conversation about what you actually need the island to do: more prep space, more seating, more storage, or some balance of all three.
Excelle Kitchen & Bath is a cabinet and storage design studio: it plans the space, designs the cabinetry and guides product selection. Booking a design consultation reserves a designer for your project; bring measurements, a floor plan or photos. If you're comparing custom, semi-custom and ready-made island cabinetry, our custom vs. semi-custom vs. IKEA comparison walks through the differences.
Ready to see what fits your kitchen? Browse our cabinet lines, or bring your kitchen's rough dimensions into our San Jose showroom for a layout consultation.
FAQ: Kitchen Island Design
What is the minimum size for a kitchen island?
There is no single minimum; what matters is the space left around it. NKBA guidelines call for work aisles of at least 42 inches with one cook and 48 inches with more than one, and at least 36 inches where the space is only a walkway. Freestanding islands are sold as small as about 50 by 31 inches (IKEA's VADHOLMA), while a 6-by-3-foot island gives more room to separate prep from seating if the room can keep those aisles.
How many people can sit at a kitchen island?
NKBA recommends 24 inches of width per seated diner, with knee space 15 inches deep at a 36-inch counter, 18 inches at a 30-inch table and 12 inches at a 42-inch counter. At 24 inches per seat, a clear 6-foot run fits three stools and an 8-foot run fits four, less any length taken by panels, supports or appliances on the seating side.
Should my kitchen island match my other cabinets?
Not necessarily. Matching keeps the selection simple, while a contrasting island color or finish, paired with the same door style, gives the room a visual focal point. Ask for both to be quoted, since any price difference depends on the cabinet line.
Can I put a sink or cooktop in my kitchen island?
Yes, but both add plumbing or ventilation requirements. A sink needs water and drain lines run to the island, which in an existing kitchen can mean opening the floor. A cooktop needs a downdraft vent or overhead hood, which can affect ductwork and overall project cost.
What countertop material holds up best on a kitchen island?
Quartz is a common choice because it is engineered to be nonporous and doesn't absorb spills. It still needs trivets under hot cookware and a cutting board for knife work, per Caesarstone's care guidance, so compare materials with your stone fabricator against how you use the island.
About the author
Anthony
Design Lead, Excelle Kitchen & Bath
Leads cabinetry and storage design at Excelle Kitchen & Bath, a design studio with a San Jose showroom serving the Bay Area. Ten years of kitchen and custom storage projects, specialising in space planning, semi-custom cabinetry specification, and closet systems.